Covid-19 has caused a lot of disruption (and not in a good way) to many companies and industries, ours included. One thing that it has done, whether in a detrimental or constructive way, is to force many of us to slow down in almost every aspects of our lives. While working from home does have its benefits, there is a difference between working from home with and without a bunch of yelling kids. While there may be those who can serenely drink their cappuccino while their kids are swinging like primates from the ceiling fan, many of us are juggling trying to get work done and trying to survive the gauntlet of emotions when it comes to educating your own kids, depending on their age. For me, this is the age where they think running around the garden stark naked screaming in the middle of the afternoon is their God given right.
But the flip side of it is that, once they are all slumbering away their misdeeds of the day, there is indeed that peace between 11 pm and 3 am that one can truly feel the serenity of a cloistered monk, and get things done. One of the things that I would suggest to do, is to probably do a backup of your data and laptop while you have time.
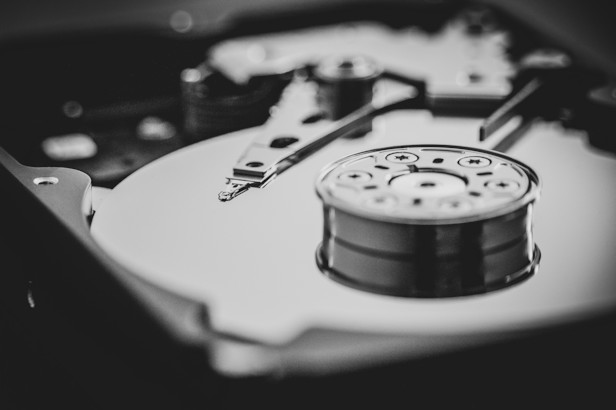
For me, one of the easiest and quickest way to do this is to just clone the entire drive you want to backup. In this short article, we will see how we can clone to a larger or equivalent drive (HDD or SSD) using this great software called Clonezilla.
Now, if you want to clone a larger drive to a SMALLER one, that might be a bit trickier, but it can possibly be done but that’s beyond this article. This is straight up backing up by cloning.
One of the frustrating thing is that there are so many software out there claiming to get this done. Minitool Partition Wizard used to be a good tool which I used previously, but the new version 12 now tricks you into doing all the steps for cloning and when you click ‘Start’, it pops up that this feature is only available in the Paid version. The previous versions (if you have) allows you to do it, but unfortunately I removed it earlier and I don’t have the offline installer for it, as all installers now automatically download the new version. Other software like Aomei Partition Assistant actually gets to the point where you can execute the cloning, but frustratingly tries to install Windows PE and fails, and then tries to go Pre-Os mode and just hangs there not knowing what to do.
Previously I did an extremely difficult cloning of a 1TB drive full of errors using DDRescue, a very, very good tool especially for drives that are strewn with bad sectors and errors which none of the bloatware out there can resolve and even Clonezilla had issues with. It took me a good part of one day just to get it done but it finally did and I managed to save all data from a drive that was dying. Again, DDRescue is a good tool, but for non-error, straight up clone, I think Clonezilla is the easiest and best.
First of all, for Clonezilla, the easiest way is to create a Live USB flash drive and use that. I used Rufus USB which is pretty straightforward but there are other ways to get it done as well. Go on to
https://clonezilla.org/liveusb.php to get a full idea of how to do this.
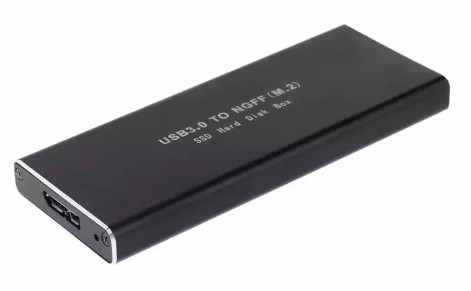
Secondly, prepare the target drive where you want to dump your drive to. A HDD/SSD would likely need an enclosure to house it. For the SSD, make sure you know which type it is and get the enclosure from Lazada or Shopee. These are fairly cheap . I got mine for around RM25 – RM30 or somewhere there. Mine looked like this:
Plug the new drive into the enclosure.
Once done, just plug in the Clonezilla USB in and reboot and ensure you are booting from USB over your BIOS. This may or may not be tricky if you are booting with UEFI with secure boot, and you may need to disable it and use legacy boot to get the USB to boot for now.
Once booted, you are welcomed to the tiny Clonezilla OS, which is Debian I believe.
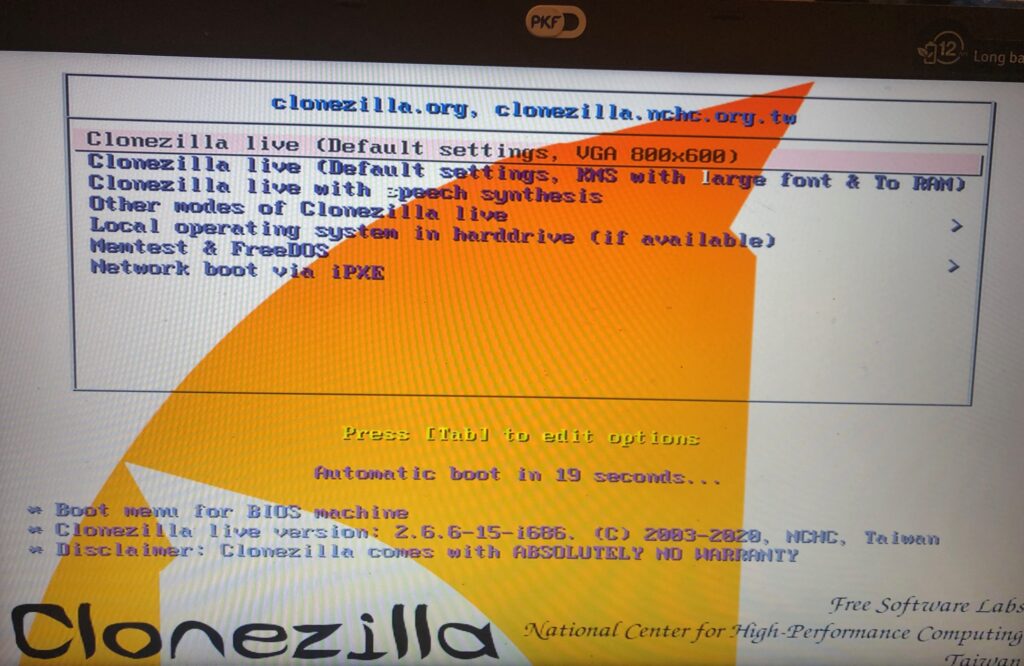
Go ahead with the default settings, but now you can plug in your enclosure USB drive, which Clonezilla should be able to detect as it boots up. It takes less than a minute and we are now dump into the main screen. Select the keyboard settings as it is, and start Clonezilla.
Select device-device as this is what you are looking at. I would opt to select “Expert mode” as this provides you with more options as you are cloning to a larger storage. If you are doing a direct mirror to a similar sized storage, using beginner mode may be less work.
Select Disk to Local Disk and at this point Clonezilla should be able to see a few things: your current drive and the drive that is plugged in using the enclosure. As in all things, you need to be wary which is which and not copy it wrongly.
Select your current drive as source and the enclosure drive as the destination.
In the expert mode, you have quite a fair bit of options. Just make sure -r option is there as this resizes the filesystem automatically and in the other part of expert parameters to select -k1 which is to create partition table proportionally.
If you are sure that the drive is fine and you are just doing a backup, then skip the checks for errors of the source file system which would save some time. If you do have errors, my suggestion would be to go to DDRescue option as opposed to Clonezilla. I tried Clonezilla on a dying drive and it didn’t work too well.
Finally, select what you’d like to do once the whole thing is done, to reboot, shutdown etc.
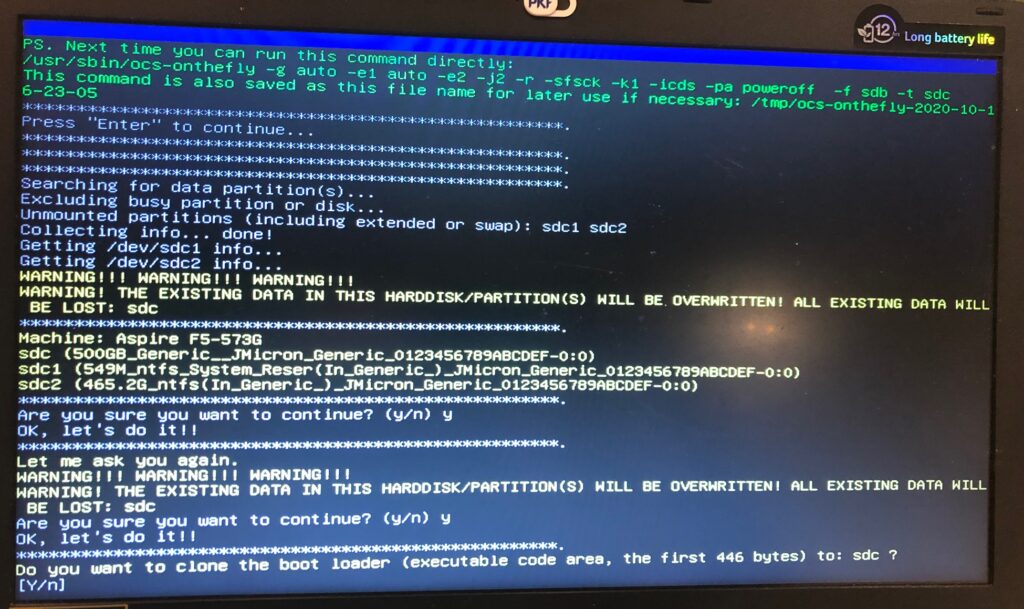
We later have a whole bunch of funny excerpt to confirm if we actually know what we are doing. Because I was cloning the OS drive, I cloned the boot loader along with it.

And finally we are off. It takes only a short while – I guess less than half an hour to get it done.I didn’t take time of it, I just let it run and did my own things and within an hour checked again and found it was completed. Based on the average rate and my 250GB, it’s roughly around 20 minutes or so.
Once that is completed, shut down your laptop, take out the old SSD and swap it with a new one and voila you now have a new expanded SSD on your OS drive. You can do frequent backups to your laptop as well by doing the same method – but getting a same size SSD – and it would save you years of trouble (if you don’t change your laptop). Even if you upgrade your laptop, you can still use the backup as an external USB drive and copy the data there on your own time.
If you plugin the enclosure that had your previous OS image, you may get the problem of Windows making it offline due to signature collisions. Just right-click and select Online for the drive and you should be good to go.
Well, that’s it.
The reason for this article is that it’s frustrating working through software like Aomei Partition or Minitool (latest version) Partition Wizard etc because there are so many things that cannot work – e.g installing Windows PE, going into Pre-Os mode and in Aomei Partition, just hanging my laptop and not moving forward. The preference is just to get a simple solution that works without forcing us to buy professional versions etc or wasting our time with software gymnastics that we don’t need. Clonezilla (or the even better DDRescue) would be the go-to software for this.
Now, stay safe, and get your kids down from the ceiling fan!